Label Model Manually
Labeling feature allows you to engrave a label on the surface of your model.
Tip: You can place several labels on one model.
Create Label
1. Select a model on the platform.
Important: You can only add a label to one model at a time. If you have multiple models selected, the Labeling feature is not active.
2. Press the  icon on the left Toolbar.
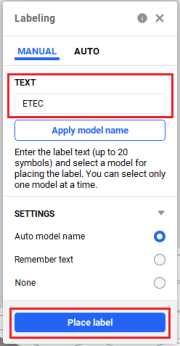
3. Type the label text into the Text field and select from three options:
- Apply model name/Auto model name: The system automatically adds the model name as a label in a text field.
- Remember text: The system saves the input text and shows it during the session until you change the text.
- None: None of the options above - the system shows an empty text field.

4. Press Place label.
→ The label marker is added.
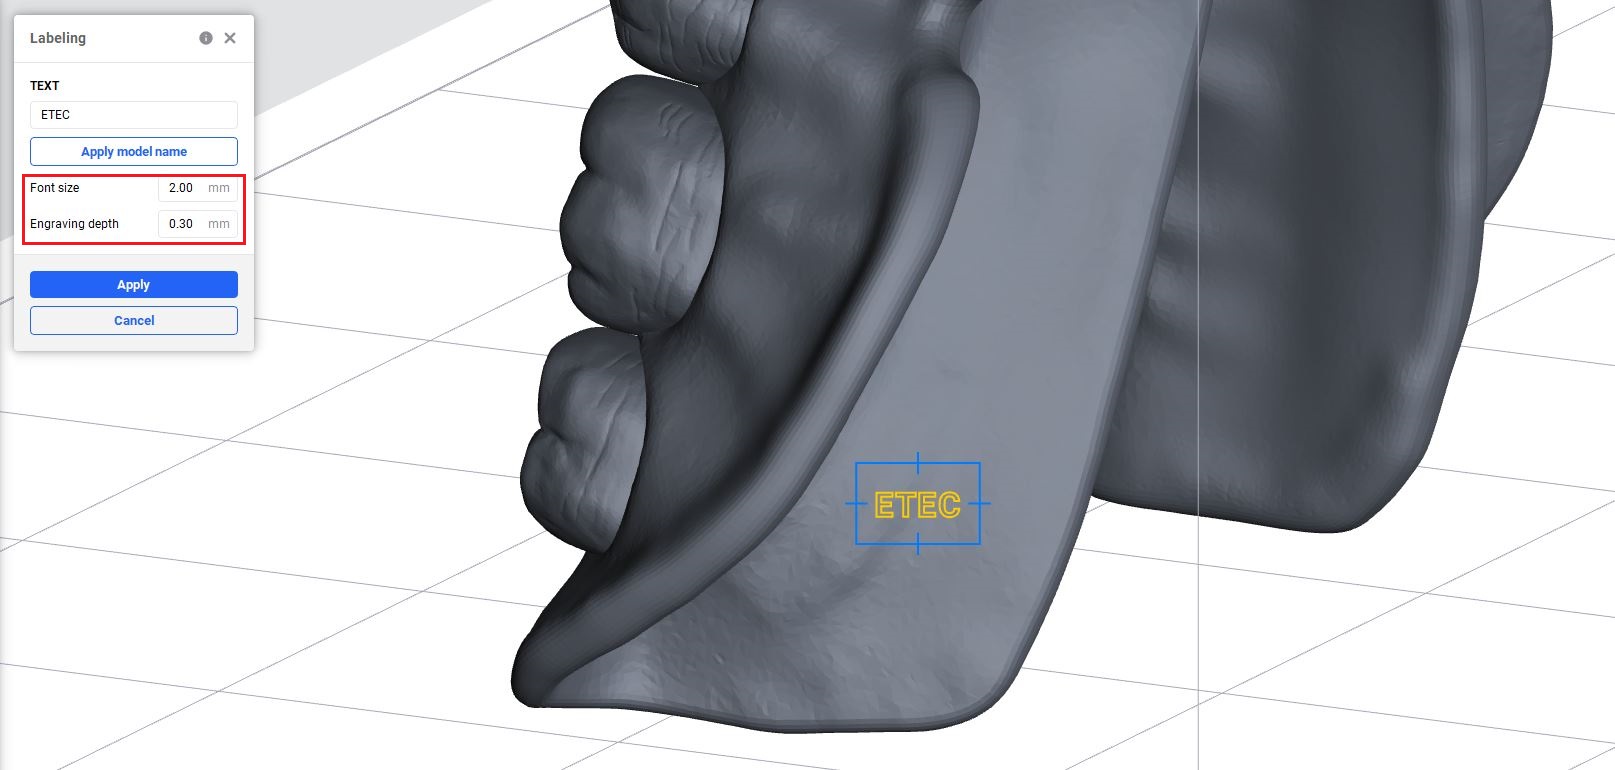
5. Set the desired font size and engraving depth of the label using either manual input or the mouse scroller.

6. Press and hold the right mouse button to move the platform and select the desired spot on the model to place the label.
Tip: To zoom in and out of your model, use the scroll wheel on your mouse.
7. Once you select the desired label placement, press Apply.
→ The label has been created and placed onto the model.
If the label does not properly fit the model surface, an error message occurs. In this case, try the following:
- Reduce the label font size.
- Press and hold the right mouse button to move the platform and select the most suitable spot on the model to place the label.
Delete Label
To delete a label, press the Back icon on the Actions Bar or use the keyboard shortcut <Ctrl>+<Z>.
![]() icon on the left Toolbar.
icon on the left Toolbar.